Creating a Google Developer Account to Publish Your App

Updated on 11. December 2024 by Jan Bunk

A cute humanoid robot registering an account at the headquarters of a large company, digital art

You are viewing a preview of this guide. Please log in to complete it!

Now that you've created your app with webtoapp.design you will need a Google developer account to publish your app in the Google Play Store. We have previously explained why it's important to create your own developer account and why you shouldn't share it with other people. So let's see how you can register a Google developer account.

To get started, please visit the signup page here: Google Developer Account Registration

You might first need to sign into your Google account, or create one if you don't have one yet.

First you need to choose between a developer account for an organization or for yourself. If your app is for your business (sole proprietorships and similar small businesses also count), choose an organizational account.

Organizational developer accounts have many advantages:

  • You can publish your app immediately (no need for a 14 day test period)
  • Apps related to highly regulated industries (e.g. finance, health, cannabis) can only be published with an organizational developer account.

If you're creating an organizational developer account, you'll typically want to select "A company or business" as organization type in the dropdown menu. Afterwards, click "Get started".

If you don't have a company, you need to register an individual developer account by clicking "Get started" in that section.
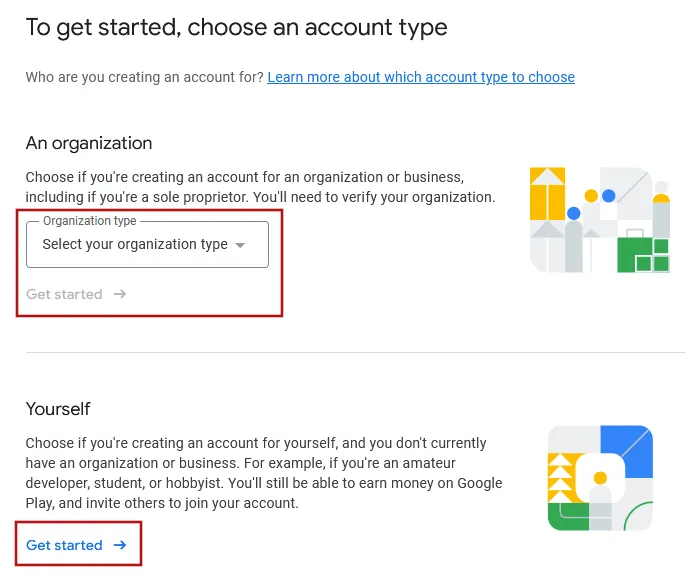
A screenshot of the page where you can choose between a developer accout for an organization or for yourself.

Next, enter a name for your developer account. It will be publicly visible and doesn't need to be identical to your company/personal name.

A screenshot of the field where you can enter your developer name.

Afterwards you'll need to create a Google payments profile. If you already have one, you will be able to select it.
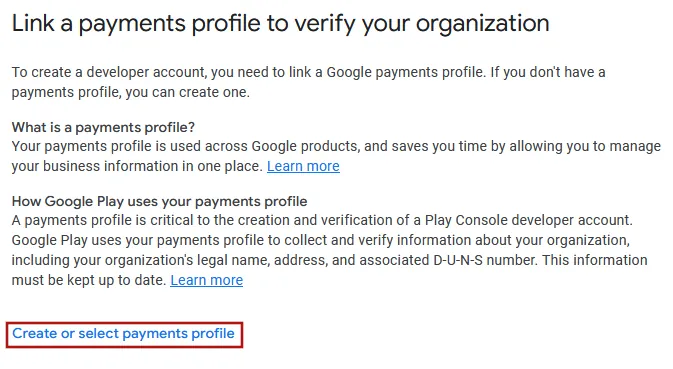
A screenshot of the page with information about the payments profile.

If you chose to register an organizational developer account, you'll now need to enter the D-U-N-S number of your company. Here is how to find or request the D-U-N-S number for your company. Afterwards, it should automatically detect your company name and address from the D-U-N-S number.
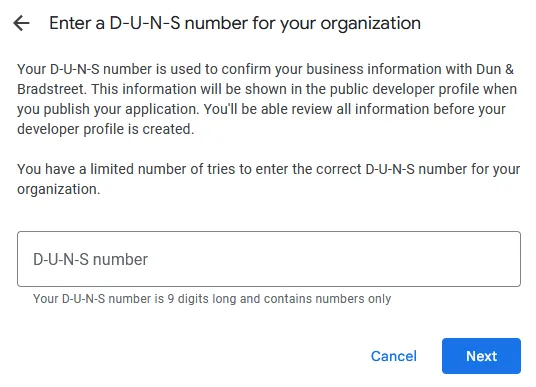
A screenshot of the popup where you can enter the D-U-N-S number.

If you're registering a personal developer account, you'll instead need to manually enter your name and address.

Next, with an organizational account you need to enter how many employees your company has, your phone number and your website.
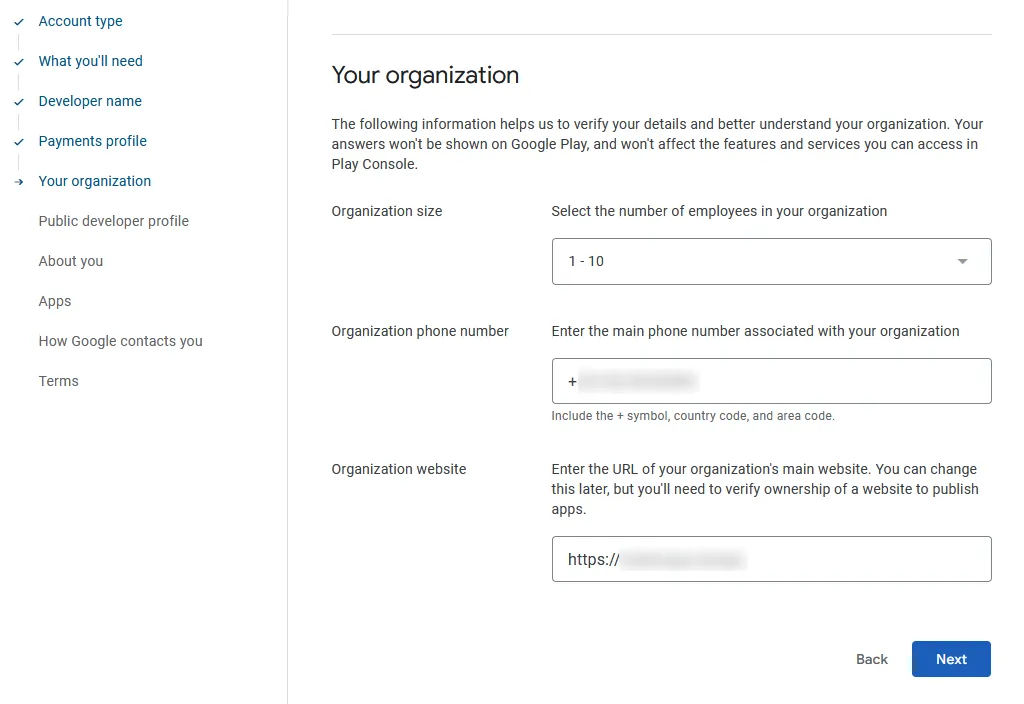
This phone number is not shared publicly, it's only for Google's communication with you. The phone number needs to be entered in this format: +(Country code)(Area code)(Phone number) for example: +491234567890
A screenshot of the page where you can enter the number of employees, phone number and website.

The following page will ask you for contact information that will be publicly visible in the Google Play Store.

Enter your phone number in this format: +(Country code)(Area code)(Phone number) for example: +491234567890 and then click the "Verify phone number" button below the phone number field and enter the verification code they send you as an SMS.

Enter your e-mail address and click the "Verify email address" button below the e-mail field and enter the verification code they send you via e-mail.
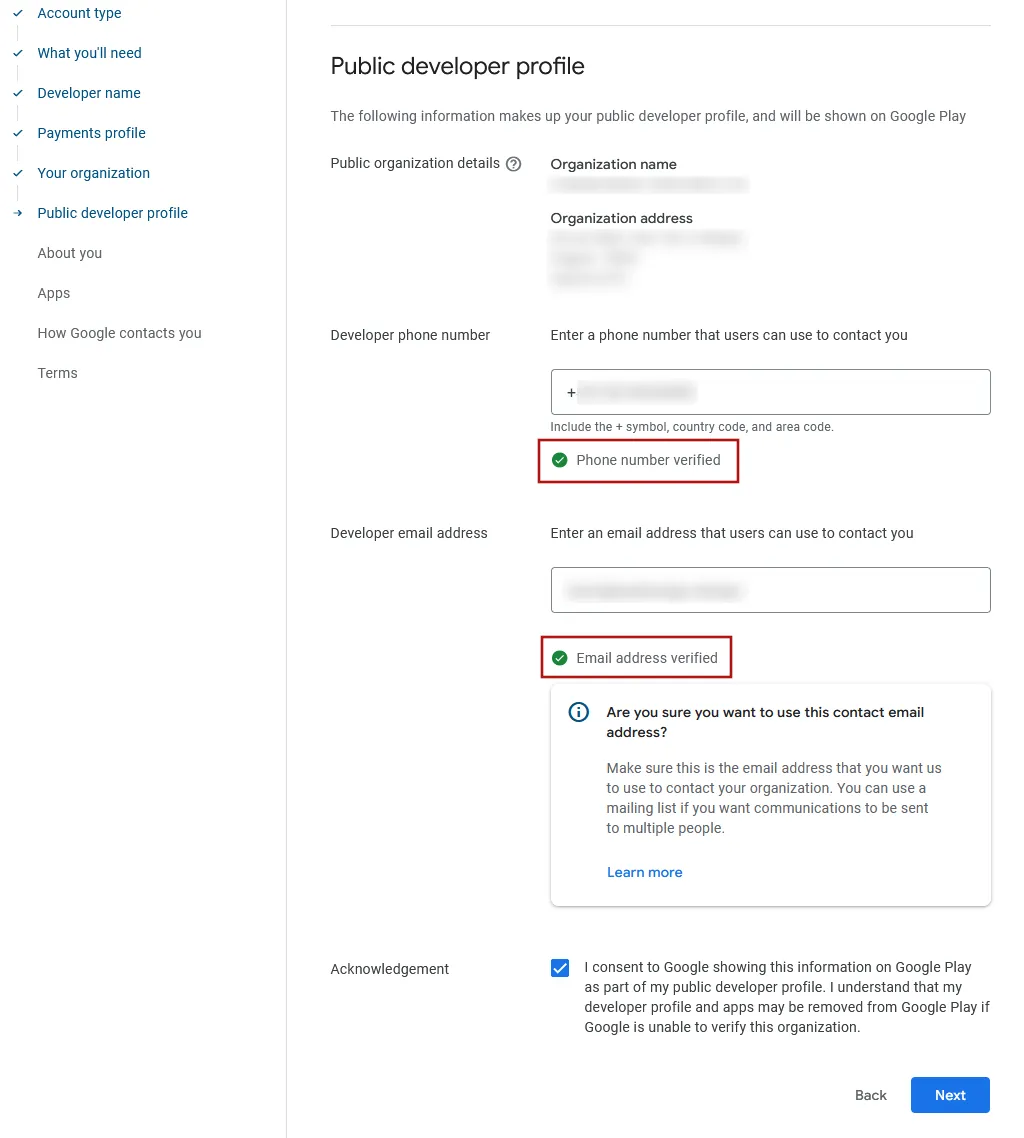
A screenshot of the page where you can enter the developer account name, contact e-mail address and phone number.

On the next page, you'll be asked about your previous experience with the Google Play Console. It's good to write a couple of sentences here, for example you could write (in your own words) that you've hired app developers to create your app and that you'd like to publish that app now. If you have previously used other Google Developer Accounts to publish apps, mention those too. Most people don't have other developer accounts and can therefore select "No".
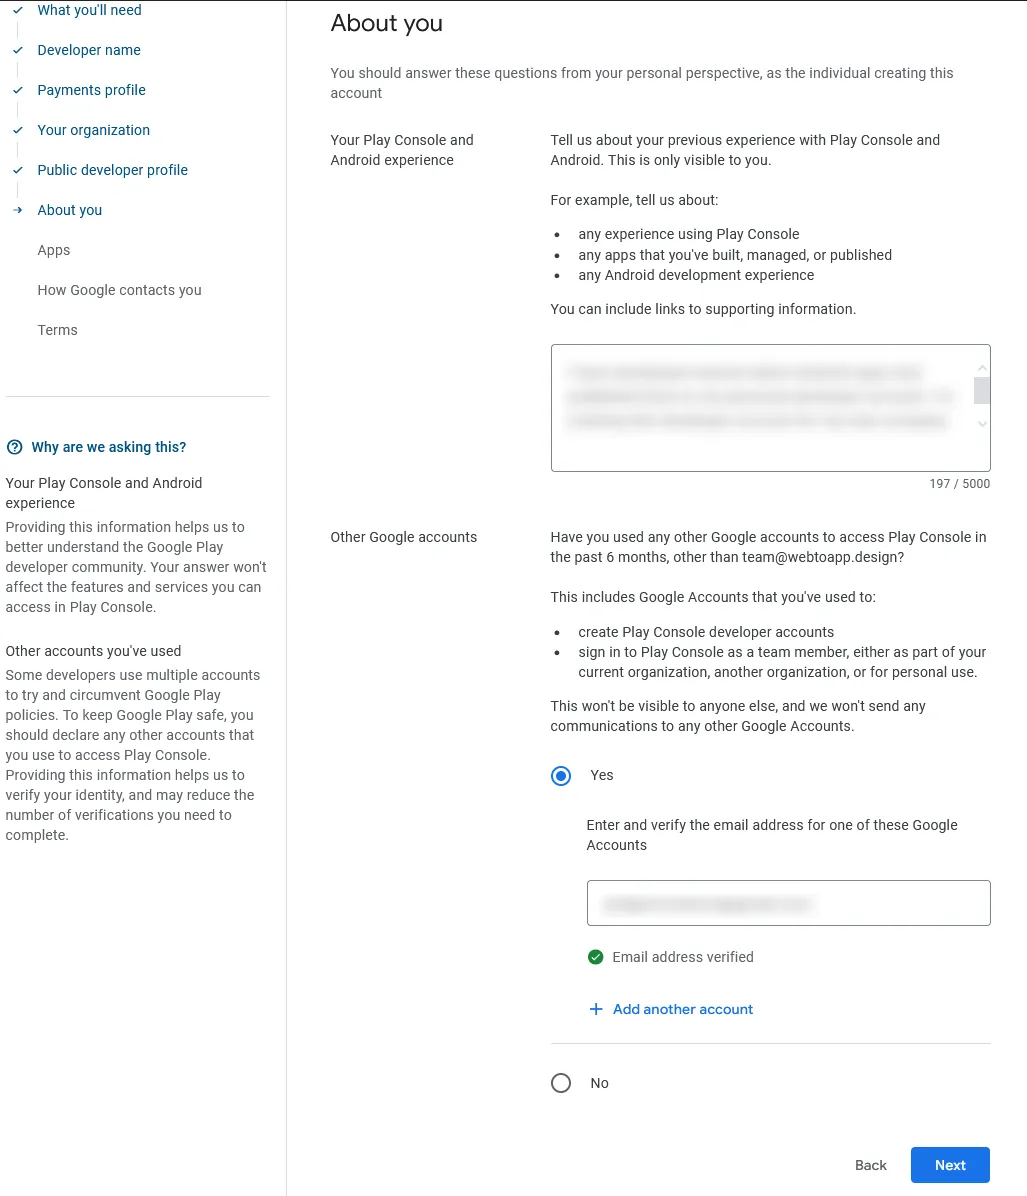
A screenshot of the page where you can enter your previous experience with the Google Play Console.

On the following page you'll be asked about how many and what kinds of apps you want to publish. In most cases, you'll select that your app falls into "None of the above" category, unless it's actually in one of these regulated industries.
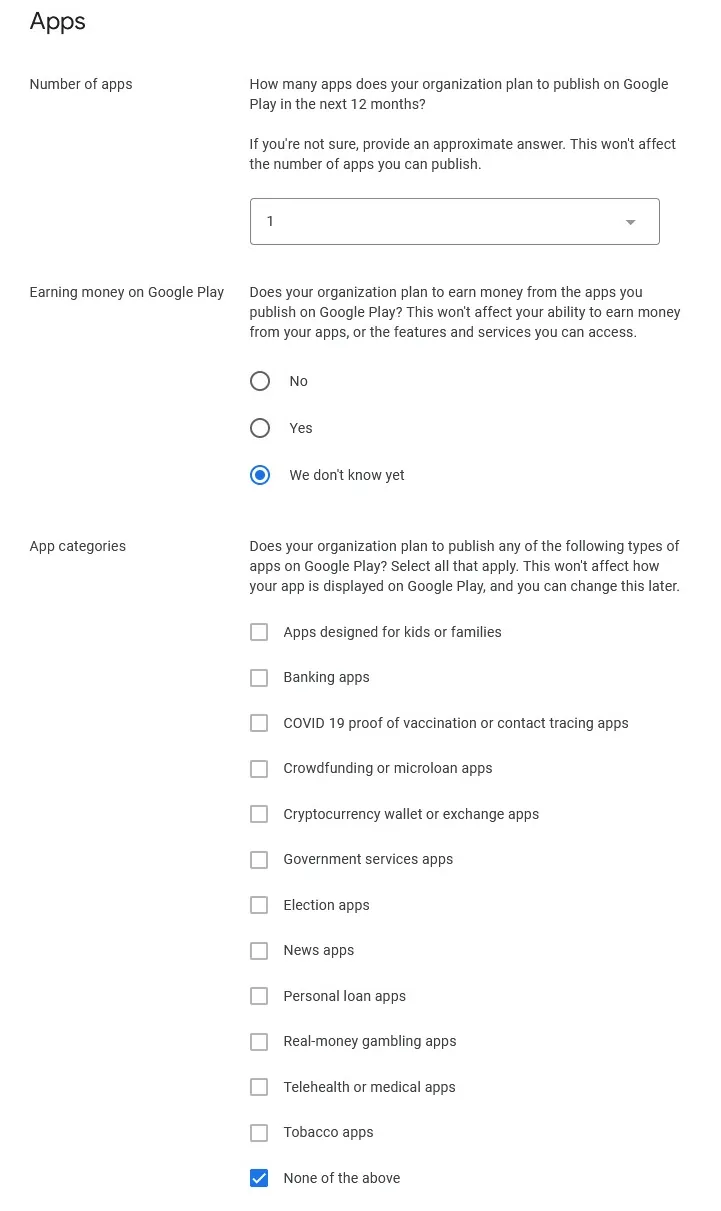
A screenshot of the page where you can select the categories of apps you want to publish.

Next, you'll need to fill out some more contact details with which Google can reach you. Make sure to verify your phone number and e-mail address using the button below the respective input field.
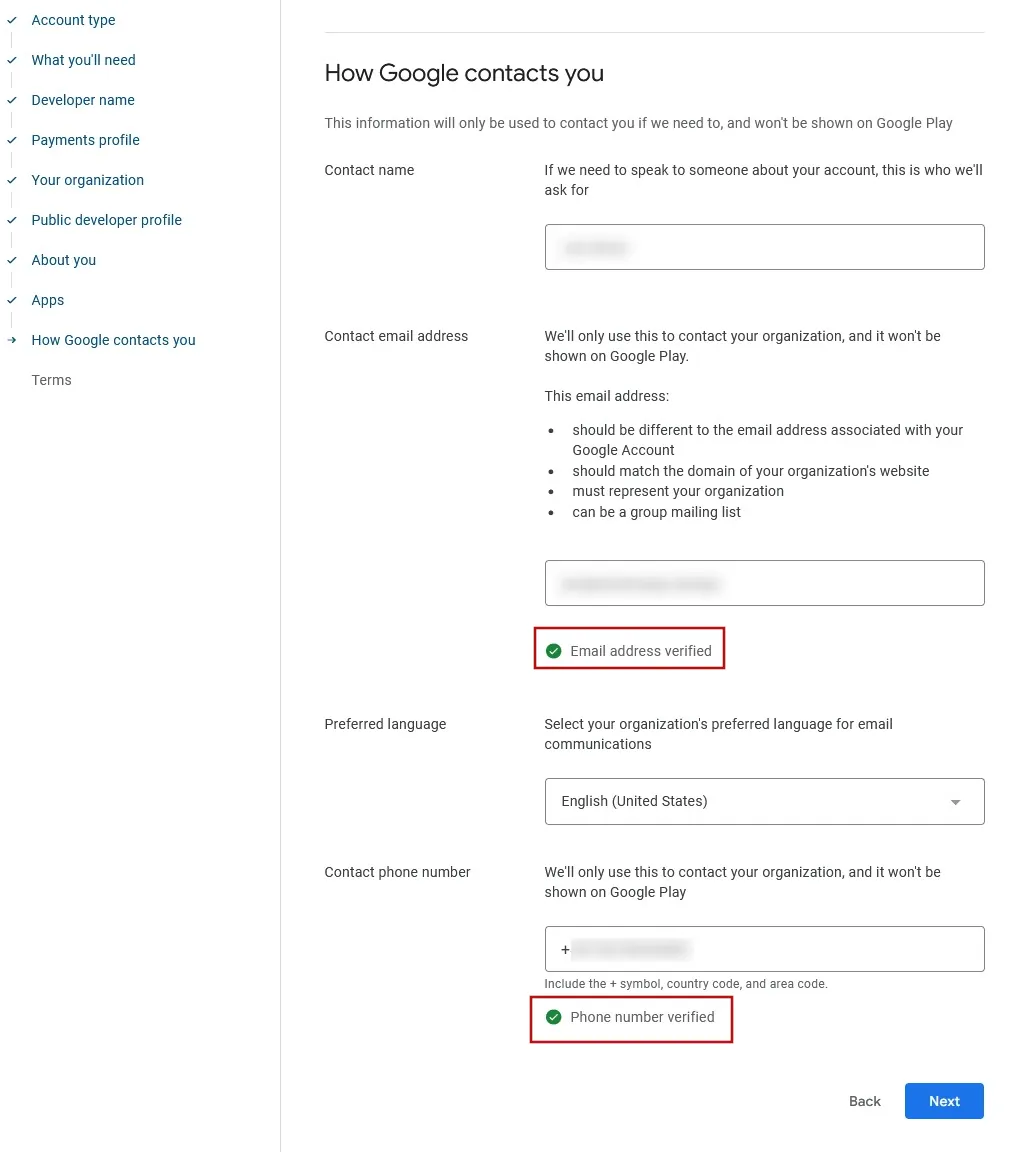
A screenshot of the page where you can enter your contact details.

On the final page you just need to accept Google's terms and conditions.
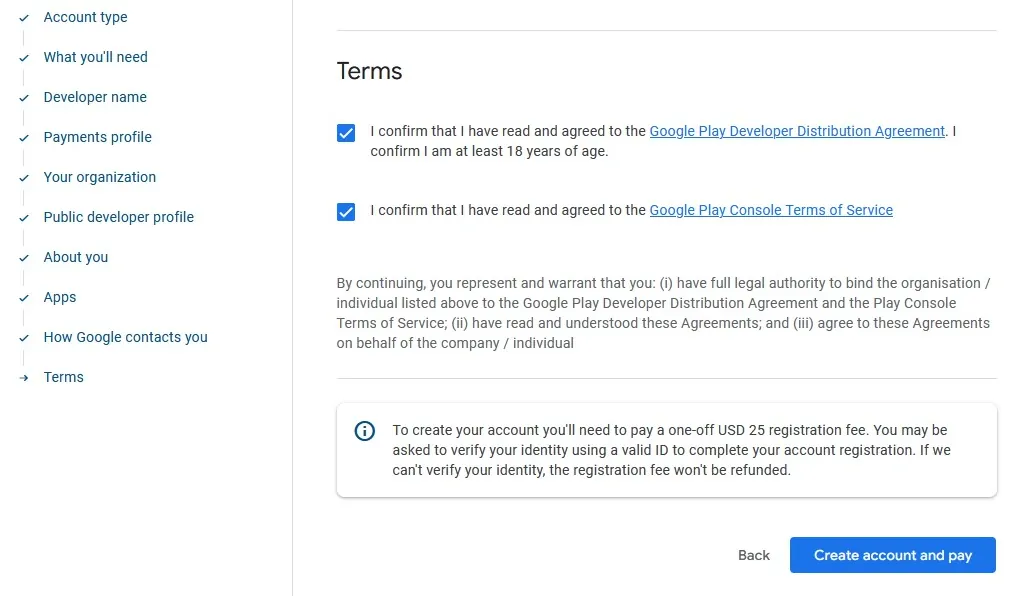
A screenshot of the page where you can accept Google's terms and conditions.

Now you can pay the $25 one-time registration fee. At the time of writing, this fee can only be paid using a credit or debit card.

After creating your account, you can open the Google Play Console. In there you'll be asked to verify your or your organization's identity.

A screenshot of the Google Play Console asking you to verify your identity.

Google always requests different methods of verification. Below you can find some information about the verification methods we've seen so far. Of course you only need to complete the verifications that Google asks from you in your Google Play Console.

Verify your identity

Here you'll need to upload some form of identification that contains your name, date of birth and address.

A screenshot of the dialog where you can upload your identity document and enter your address.
Verify your website

To verify that you own your website, you need to first register it in the Google Search Console. Since the Google Search Console allows you to view lots of information about how your website appears on Google, many people have already verified their website there already. If you haven't registered your website in the Google Search Console, you can do so here.

As soon as your website is verified in the Google Search Console, you can click "Verify website" in the Google Play Console, which will then send a verification request to the Google Search Console. You should receive an e-mail from the Search Console with a link to accept the verification request. Alternatively, you can find the request here.

A screenshot of the website verification instructions in the Google Play Console.
Verify that you have access to an Android mobile device

Here you'll need to download the Google Play Console app from the Google Play Store on an Android device. Make sure you're logged into the Google account with which you created the developer account.

If you don't have an Android device, please borrow one from a friend or family member and perform the steps on their device. If you can't borrow a device either, your best option might be to buy a cheap Android device. For example Xiaomi has some very affordable models, some costing less than 100€.

A screenshot of the Google Play Console explaining how to verify your access to an Android device.

After submitting, it will take a couple of days until Google has checked your verification.

A screenshot of the message saying Google is currently verifying your details.

Copy your account name and account ID from your account overview page in the Google Play Console.

The developer account name and the id highlighted in the Google Play Console.

Enter the name and ID in the fields below:

Open the "Users and permissions" page in the Google Play Console.

Go through each user and click the "Manage" button (blue arrow).

A screenshot of the Google Play Console interface showing the role of the user, in this case "Account owner".

Continue until you find the account owner (not admin) and then copy the e-mail address. Paste the e-mail address of the account owner in the field below.

A screenshot of the Google Play Console interface showing the role of the user, in this case "Account owner".

Make sure to click this button, otherwise we won't receive the entered information and you will need to do the steps again.

Author Jan Bunk
Written by
Jan Bunk

Hi, I'm Jan! I created webtoapp.design in 2019 while studying computer science in university. A lot has changed since then - not only have I graduated, but it's also no longer just me running webtoapp.design. We've grown to a global, fully remote team and have gathered lots of experience around app development and app publishing. We've created and published hundreds of apps in the app stores, where they've been downloaded millions of times.