이 페이지에서 설명하는 기능을 사용하려면 푸시 알림이 포함된 요금제가 필요해요.
오랫동안 iOS 사용자에게 푸시 알림을 보내려면 먼저 권한을 요청해야 했어요. Android 13부터는 Android 사용자에게도 동일하게 적용돼요.
기본적으로 webtoapp.design으로 만든 앱은 앱을 일정 횟수만큼 연 후 자동으로 권한을 요청해요. 푸시 알림 설정에서 해당 횟수를 조정할 수 있어요.
앱을 사용하는 동안 다른 시점에 푸시 알림 권한을 요청하려면 다음 JavaScript 함수를 사용할 수 있어요.
JavaScript 함수 사용하기
참고할 만한
executeWhenAppReady() 함수가 포함된 앱 도우미 스크립트를 확인해 보세요. 이 함수는 앱이 준비되기 전이나 웹사이트가 일반 브라우저에서 로드되었을 때 웹사이트에서 앱과 상호작용을 시도하지 않도록 해줘요(ReferenceError, 함수가 정의되지 않음). notificationPermissionsGranted
사용자가 푸시 알림 권한을 허용했는지 확인하려면 이 함수를 사용하세요.
<script>
    try {
        // returns true or false
        let granted = (await notificationPermissionsGranted())["granted"];
    }
    catch (e) {
        // Can occur if:
        // - the app couldn't connect to the native code. Should be very unlikely.
        // - the app couldn't get the push notification permission status. Should be very unlikely.
        // - push notifications are not included in your current plan
        console.log(e);
    }
</script>
requestNotificationPermissions
푸시 알림 권한 요청 메시지를 표시하려면 이 함수를 사용하세요.
이 함수는 불리언 매개변수 하나를 받아요. 이 매개변수는 사용자가 이전에 일반 권한 요청을 거부한 경우 설정을 열지 여부를 결정해요. 다음은 Android와 iOS에서 열리는 설정 페이지의 스크린샷이에요.
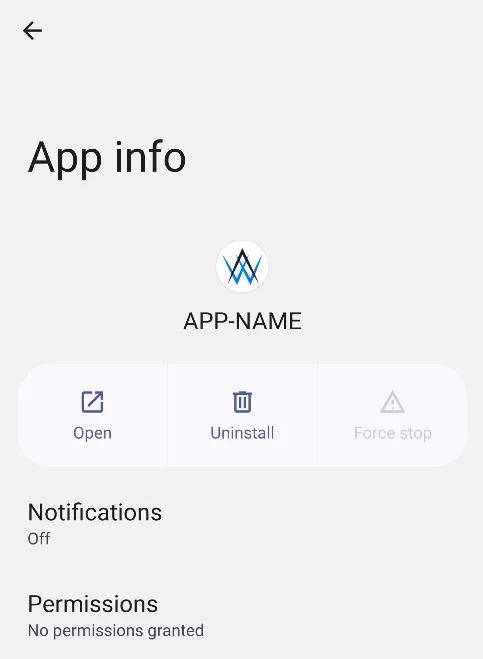
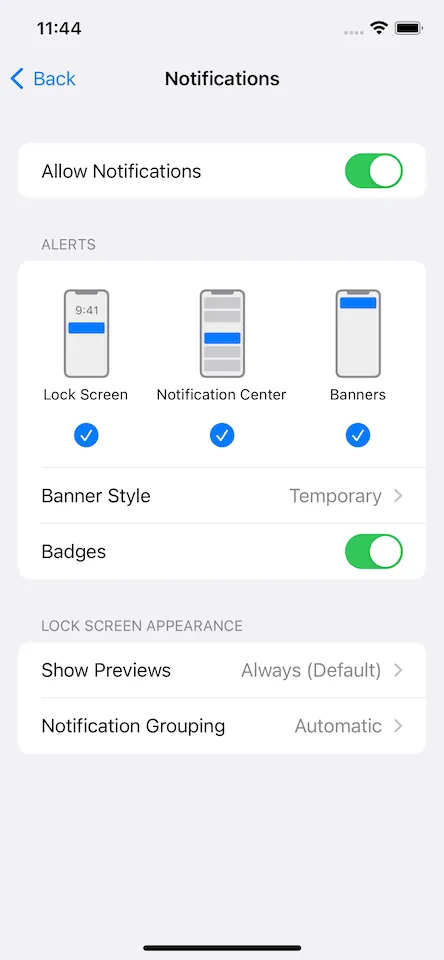
이 동작은 사용자에게 혼란을 줄 수 있으므로 사용자가 푸시 알림을 활성화하고 싶다고 명시적으로 표시한 경우에만 매개변수를 true로 설정해야 해요. 매개변수가 false로 설정되어 있으면 이전 권한 요청이 허용되지 않은 경우 함수가 아무 작업도 하지 않을 수 있어요.
<script>
    try {
        let openSettingsIfNecessary = false;

        // doesn't return anything
        await requestNotificationPermissions(openSettingsIfNecessary);
    }
    catch (e) {
        // Can occur if:
        // - the app couldn't connect to the native code. Should be very unlikely.
        // - the app couldn't ask for push notification permissions. Should be very unlikely.
        // - push notifications are not included in your current plan
        console.log(e);
    }
</script>