How to Set Up Pricing and Availability for Your App

In this article we cover how you set the App Store price for your app and decide in which countries it should become available.

Posted on 19. April 2025 by Jan Bunk

A price tier and country availability selection flowing into mobile payment.
You are not logged in. This guide can only be completed if you have converted your website into an app with webtoapp.design.
This guide is part of the app publishing process. You should only complete it when asked to in the app publishing timeline.
Open the App Store Connect app overview.

Select your app.

Click "Pricing and Availability" in the menu on the left.
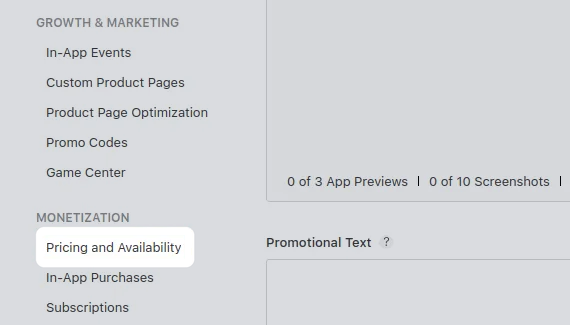
A screenshot of the app store connect menu with the pricing and availability button in the monetization category.

Click "Add Pricing".

A screenshot of the price schedule section with the add pricing button highlighted.

Select the price for your app. Choose 0.00 if you want to make your app free. Afterwards, click "Next" twice.

A screenshot of the dialog where you can select the base country and price for your app.

Confirm the prices.

Screenshot of the dialog to confirm the selected pricing.

Below the prices, click "Set Up Availability".

A screenshot of the app availability section with the set up button highlighted.

Select "All Countries or Regions" unless you want to restrict where your app should be available. In that case, select "Specific Countries or Regions". Afterwards, click "Next".

A screenshot of the app availability dialog.

If you chose "Specific Countries or Regions" select the countries in the next step.

Click "Confirm".

A screenshot of the "Make app available in 175 countries or regions after releasing it?" dialog.
A tester comparing separate blue staging and dark production website environments

Testing Your App with a Staging Environment

Here's how to use your website's test environment inside your app to safely test upcoming changes or app-specific features. There are quick methods and advanced options like separate test apps.