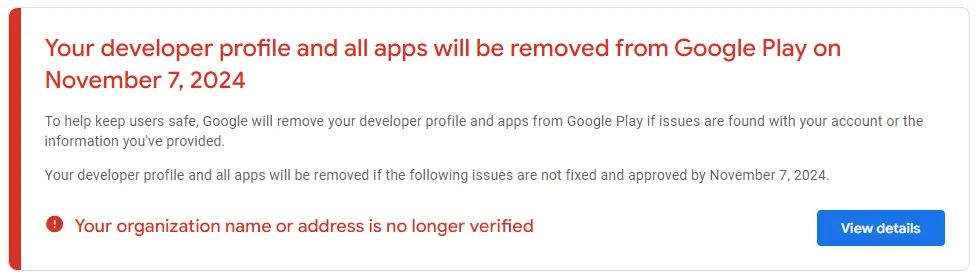
When your official business name or address changes, Dun & Bradstreet, who issue the D-U-N-S number, automatically update their records. They then inform Google about it, who will ask you to verify your business name or address again. Google will notify you about this via e-mail and you will see a message like this in the Google Play Console:
To verify the new address, you need to fill out a form from Google. Since there's some things to pay attention to, please follow the instructions below to fill out the form correctly.
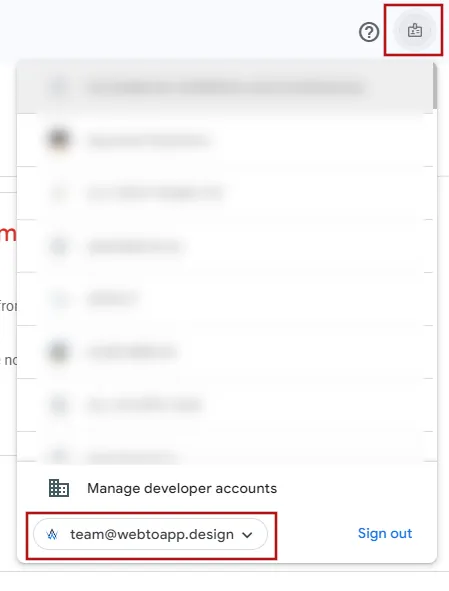
First, you need to find the correct Google account.
Begin by opening the Google Play Console.
Now click the developer account icon in the top right corner. You'll then see the e-mail address of the account you use in the Google Play Console at the bottom of the popup that opens:
Now, open the link to the form.
On that page, click your Google account icon at the top right of the screen and select the account with the e-mail address you found in the previous step.
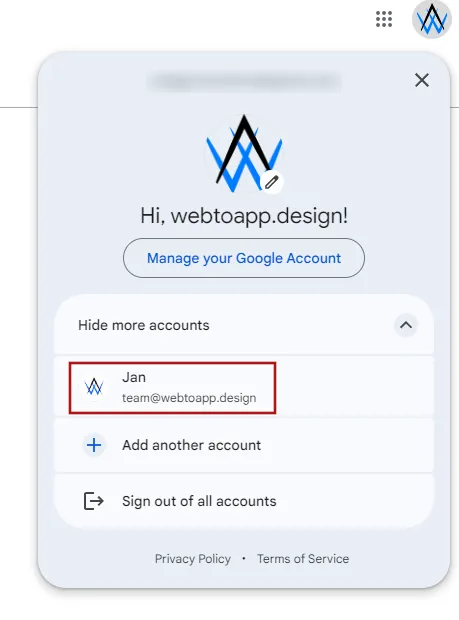
Afterwards, the email address field of the form should automatically be filled out with that same correct e-mail address.
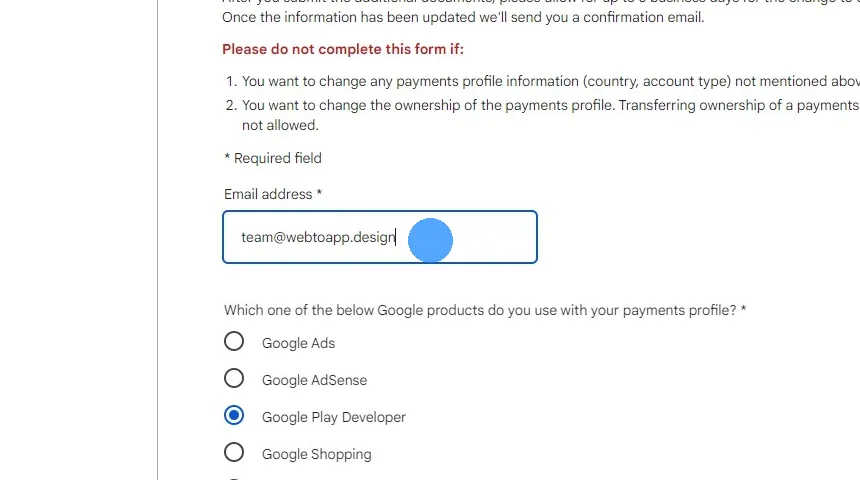
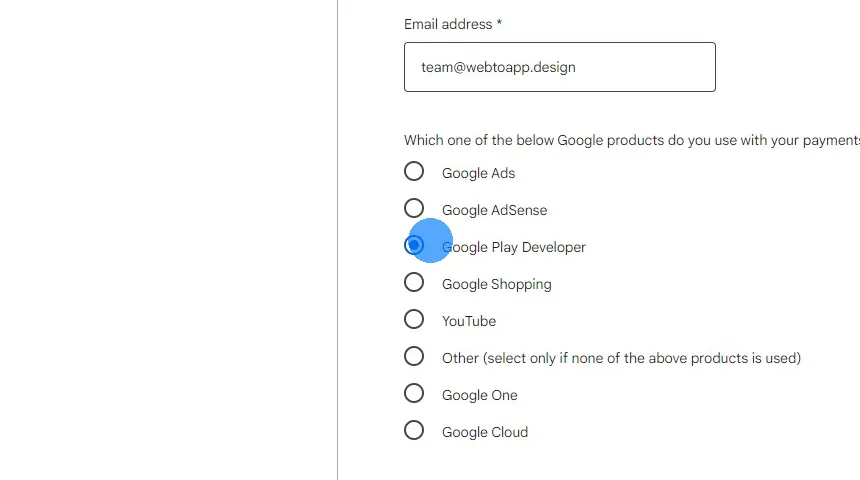
Select "Google Play Developer"
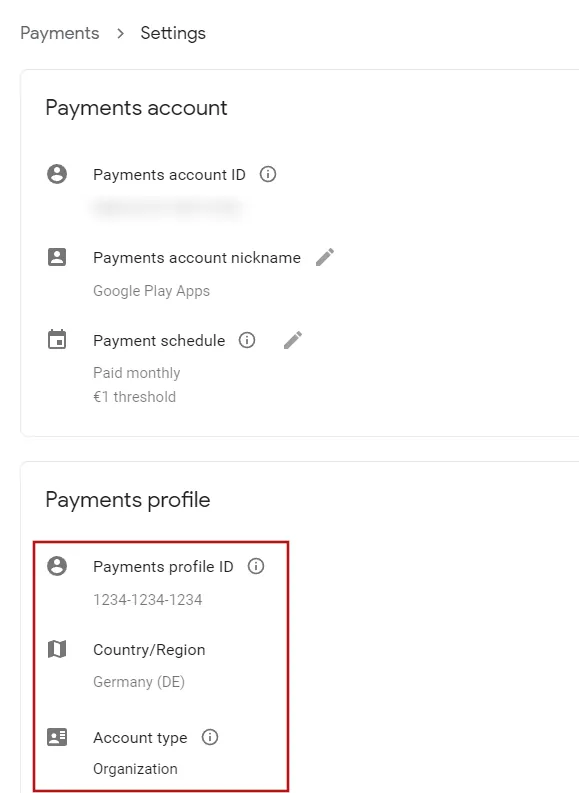
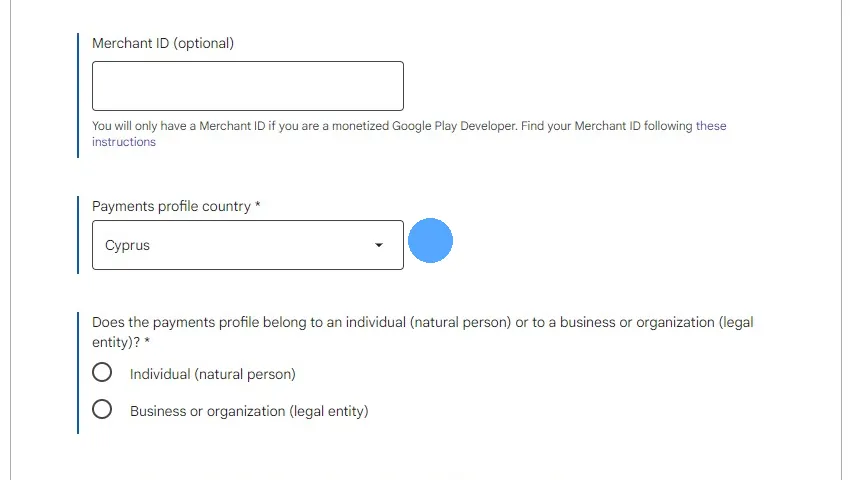
Open the payment settings page in the Google developer account. Copy the payments profile ID. Also note down the account type.
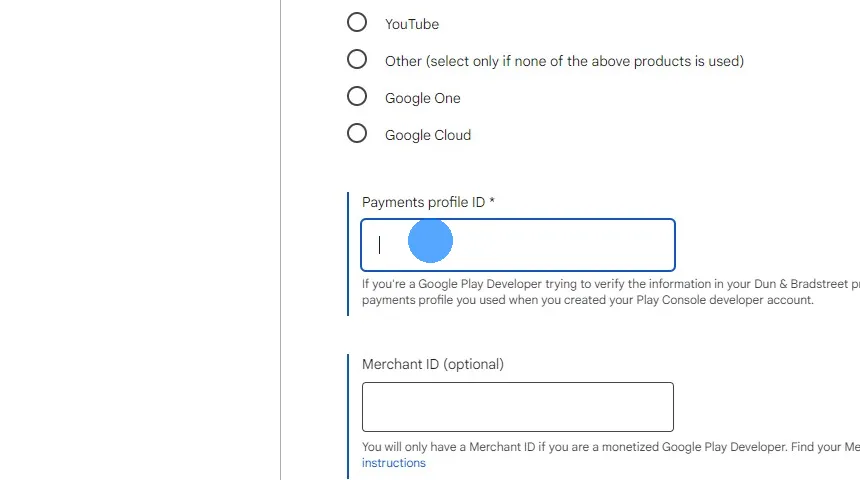
Paste your payments profile ID in the form.
Open the Google payments profile settings.
Again make sure that you're logged into the correct Google account using the profile icon at the top right.
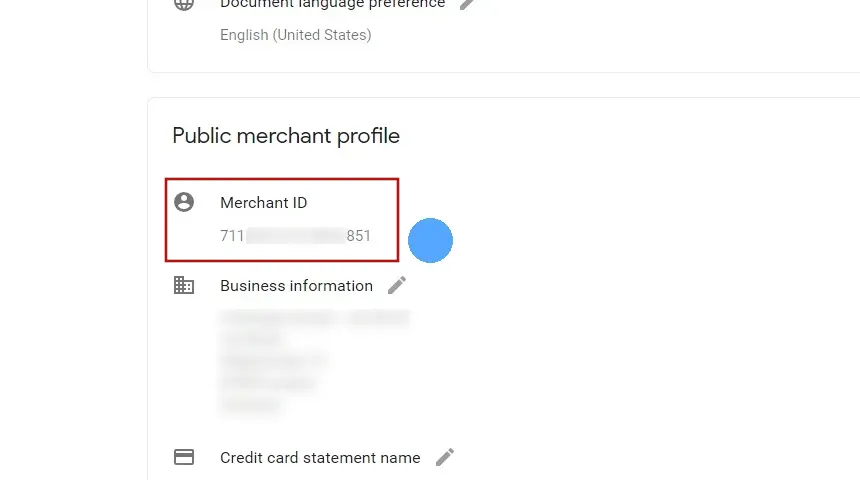
If available, copy the Merchant ID and paste it in the form.
Select the country where your company is registered.
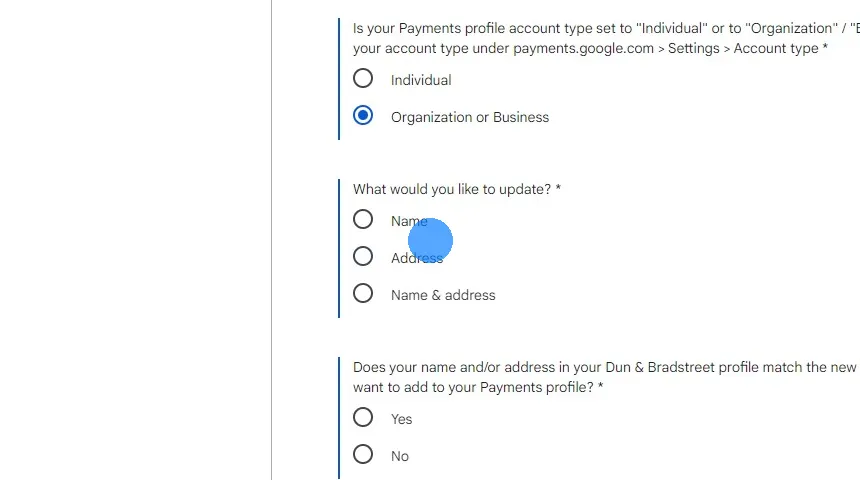
Earlier, you noted the account type of your payment profile. Select the same account type for the next two questions.
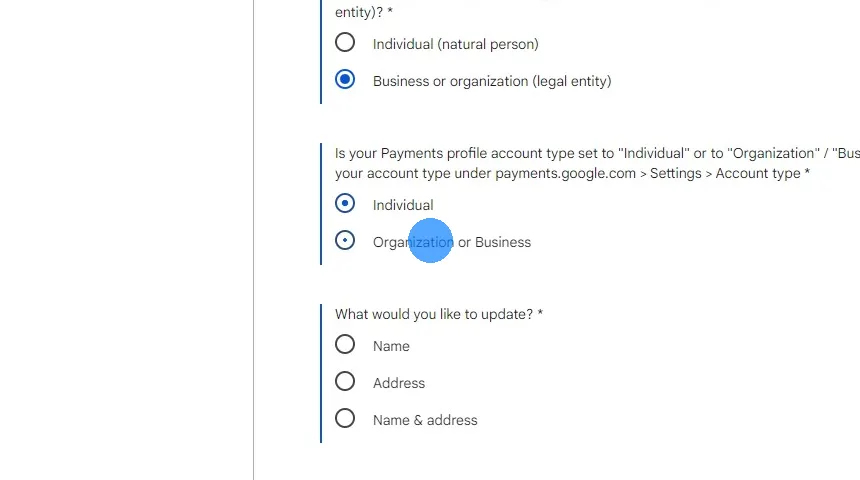
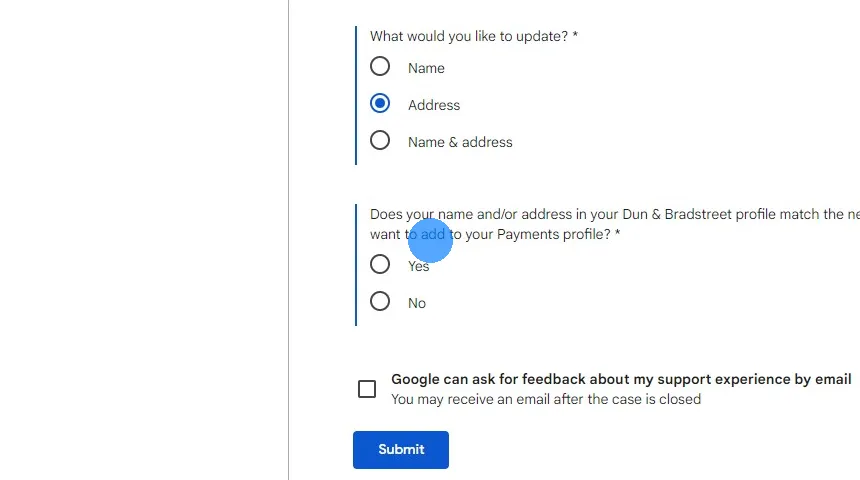
Select whether your company's name, address or both changed.
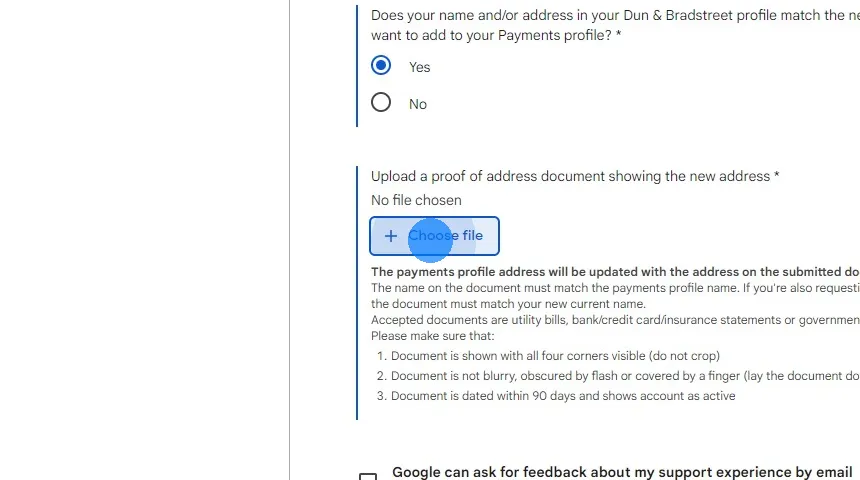
Click "Yes".
Upload a document that shows your company's current name and address. Accepted documents are utility bills, bank/credit card/insurance statements or government-issued documents. The document may not be older than 90 days.
Now you can submit the form. Please allow for up to a few days until you hear back from Google that your address/business name was updated.