Apple keurt apps af die gebruikers een account laten aanmaken, maar ze niet ook vanuit de app zelf een accountverwijdering laten starten.
Beste oplossing: bied accountverwijdering aan op je website
Voor apps die op websites zijn gebaseerd, is de beste oplossing meestal om accountverwijdering aan je website zelf toe te voegen. Zo werkt de functie op dezelfde manier op het web en in de app.
De ideale setup is een self-serve optie om het account te verwijderen in het accountgedeelte van de gebruiker. Als dat nu te lastig is om te bouwen, kan een speciaal formulier voor een verzoek tot accountverwijdering ook werken.
Als je een aanvraagformulier gebruikt, moet dat specifiek voor accountverwijdering zijn. Apple accepteert geen algemeen supportformulier waarbij accountverwijdering slechts één van de vele onderwerpen is.
Alternatieve oplossing: gebruik de ingebouwde app-functie
Je kunt ook de ingebouwde functie voor accountverwijdering van de app gebruiken. Hier vind je meer informatie over hoe je dit inschakelt. Zorg er wel voor dat het instellingen-scherm met de accountverwijderingsfunctie bereikbaar is in je app.
Vertel Apple waar ze het kunnen vinden
Nadat je de accountverwijderingsfunctie hebt toegevoegd, reageer je naar Apple en vertel je precies waar ze het in de app kunnen vinden.
Als je de ingebouwde accountverwijderingsfunctie van de app gebruikt, kan de uitleg bijvoorbeeld zo zijn:
- Als je de drawer-layout gebruikt: Je vindt de functie om het account te verwijderen hier: Zijmenu -> Instellingen -> Gegevens verwijderen
- Als je de navigatiebalk-layout gebruikt: Je vindt de functie om het account te verwijderen in de instellingen (rechtsonder in de navigatiebalk)
Als je de accountverwijderingsfunctie aan je website hebt toegevoegd, leg dan uit hoe je ernaartoe navigeert.
Als Apple de app een tweede keer heeft afgekeurd omdat ze de functie nog steeds niet kunnen vinden, ook al heb je de stappen beschreven, stuur ze dan een schermopname waarin je in de app naar de functie voor accountverwijdering navigeert.
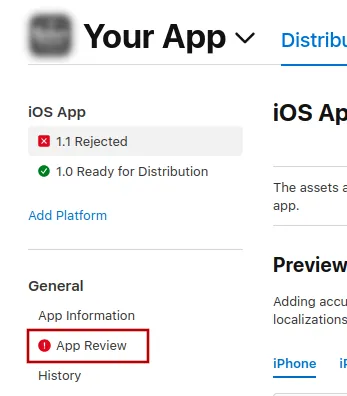
Om Apple een bericht te sturen, klik je op "App Review".
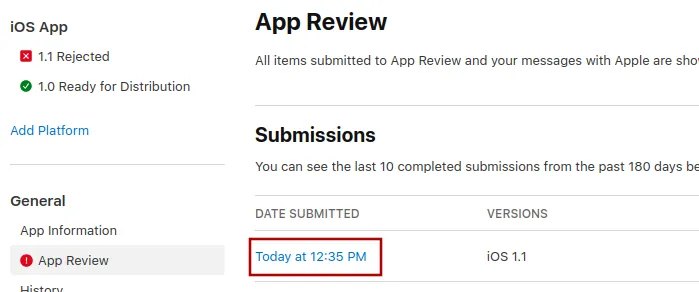
Selecteer daar de nieuwste indiening.
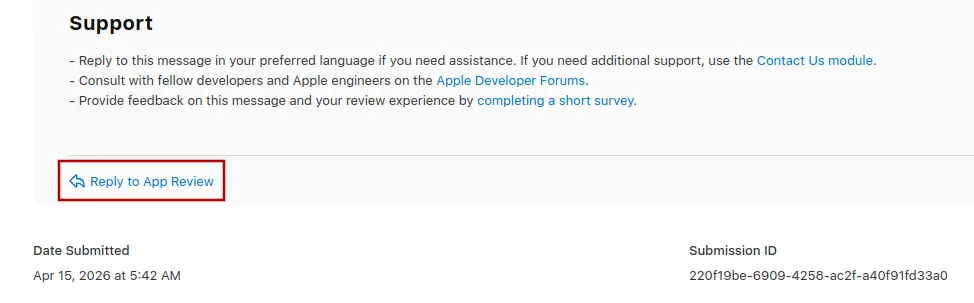
Nu kun je naar beneden scrollen tot onderaan Apple’s afkeuringsbericht en op "Reply to App Review" klikken en je bericht schrijven in de popup die opent.
De app opnieuw indienen voor review
Als dit de laatste of enige reden was voor de afkeuring van je app, volg dan deze stappen om je app opnieuw in te dienen voor review:
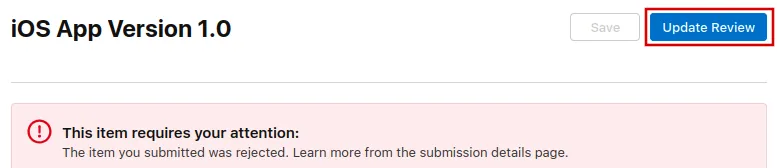
Ga naar de versiepagina door bovenaan je scherm op "Distribution" te klikken of op het versienummer in het menu links.

Klik nu rechtsboven op de knop "Update Review".
Klik daarna op "Resubmit to App Review" op de volgende pagina die opent.

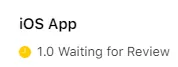
Er moet dan staan ‘Waiting for Review’ (‘Wachten op beoordeling’).